Munch-Munch Boss Guide: The Rockfalls Kobold in The Blood of Dawnwalker
Beat Munch-Munch in The Blood of Dawnwalker: the Rockfalls cave kobold, its four-segment boss bar, the red-skull unblockable attacks, and the exact loot.
よくある質問
Where is Munch-Munch in The Blood of Dawnwalker?
What does Munch-Munch drop?
How do you beat Munch-Munch?
Is Munch-Munch a kobold?
How hard is the Munch-Munch fight?
What Is Munch-Munch in The Blood of Dawnwalker?
Munch-Munch is the name the game prints, centred above its own health bar, and it belongs to a gaunt pale-blue cave kobold — spiked crest radiating off the skull, enormous eyes, arms that reach past its knees, a long tail, ribs showing through the skin. It is not a person, it carries no weapon, and it fights from a nest of bones and twigs at the back of a flooded-looking cavern. The encounter sits on the same /bosses/ index as the game’s named duelists but plays closer to the feral /bosses/ravenous-bear/ than to any of them.
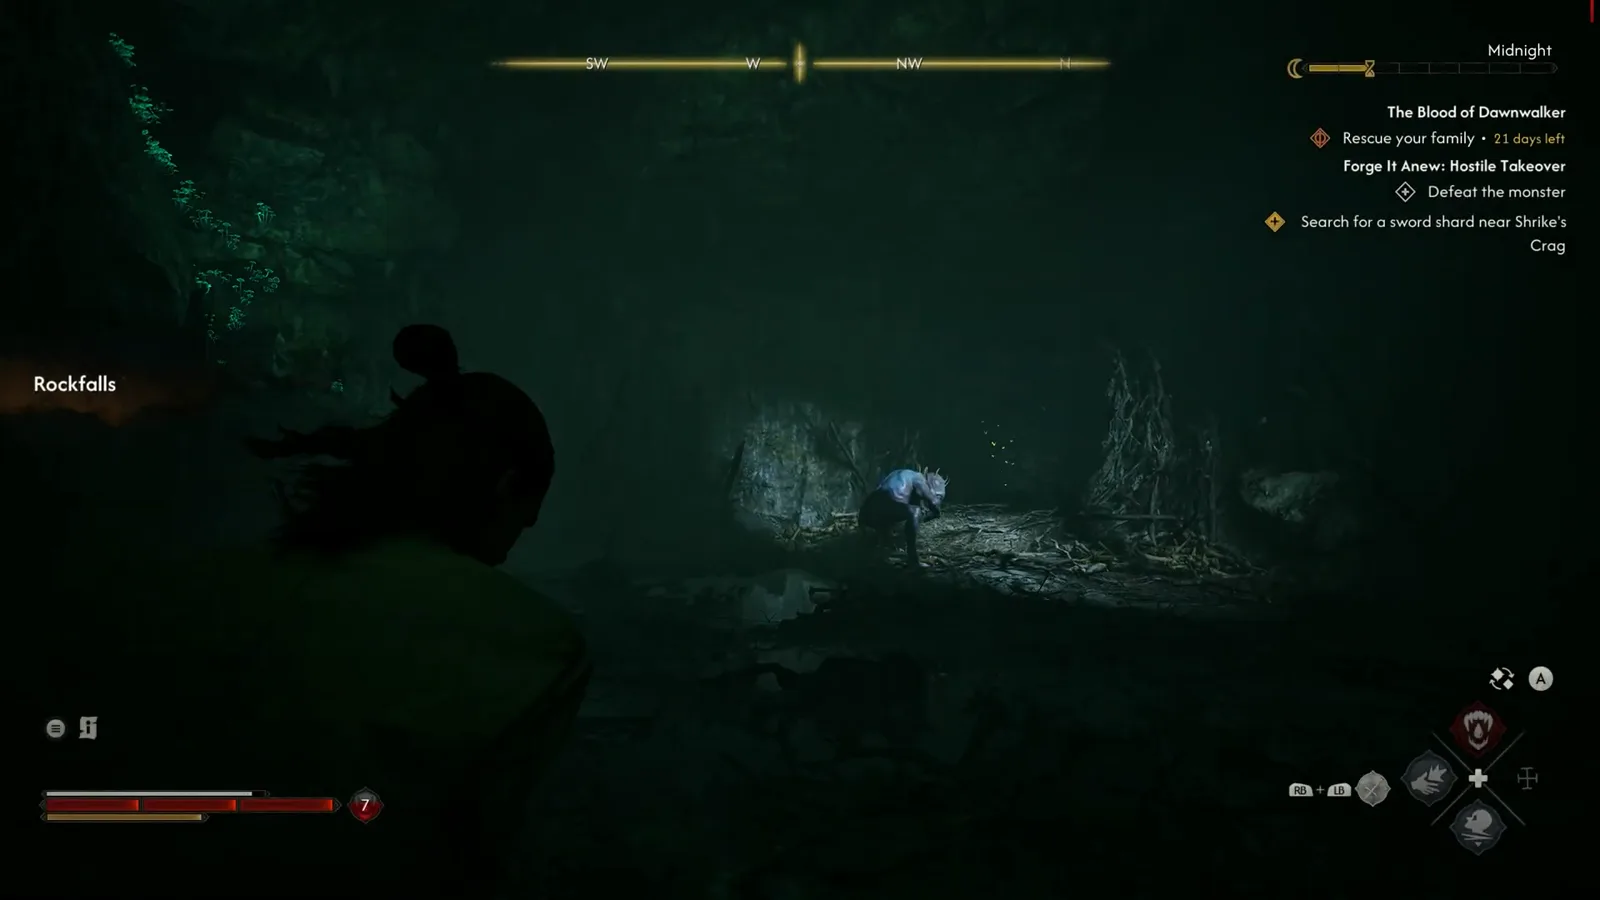
One second before the boss bar appears, the HUD still has room to tell you where you are and what you are doing. Watch the Rockfalls tag at 0:01
Read that top-right tracker carefully, because it is the whole quest context in four lines: the time-of-day label Midnight beside its moon bar, the main quest The Blood of Dawnwalker with “Rescue your family • 21 days left”, then Forge It Anew: Hostile Takeover with the active step “Defeat the monster”, and below that “Search for a sword shard near Shrike’s Crag”. The boss is a gate inside a blade-reforging errand, not a destination you go looking for.
Note also what happens the moment the fight starts: in every frame taken during the duel itself, the tracker is gone. The named boss bar takes the top of the screen and the quest panel disappears with it, returning only once the bar does. Worth knowing if you want to check an objective mid-fight — you cannot.
The creature is easiest to read a few seconds later. At 0:08 in the same capture it is hunched toward Coen with one hand down near the ground, and there is a small red skull burning on its shoulder.
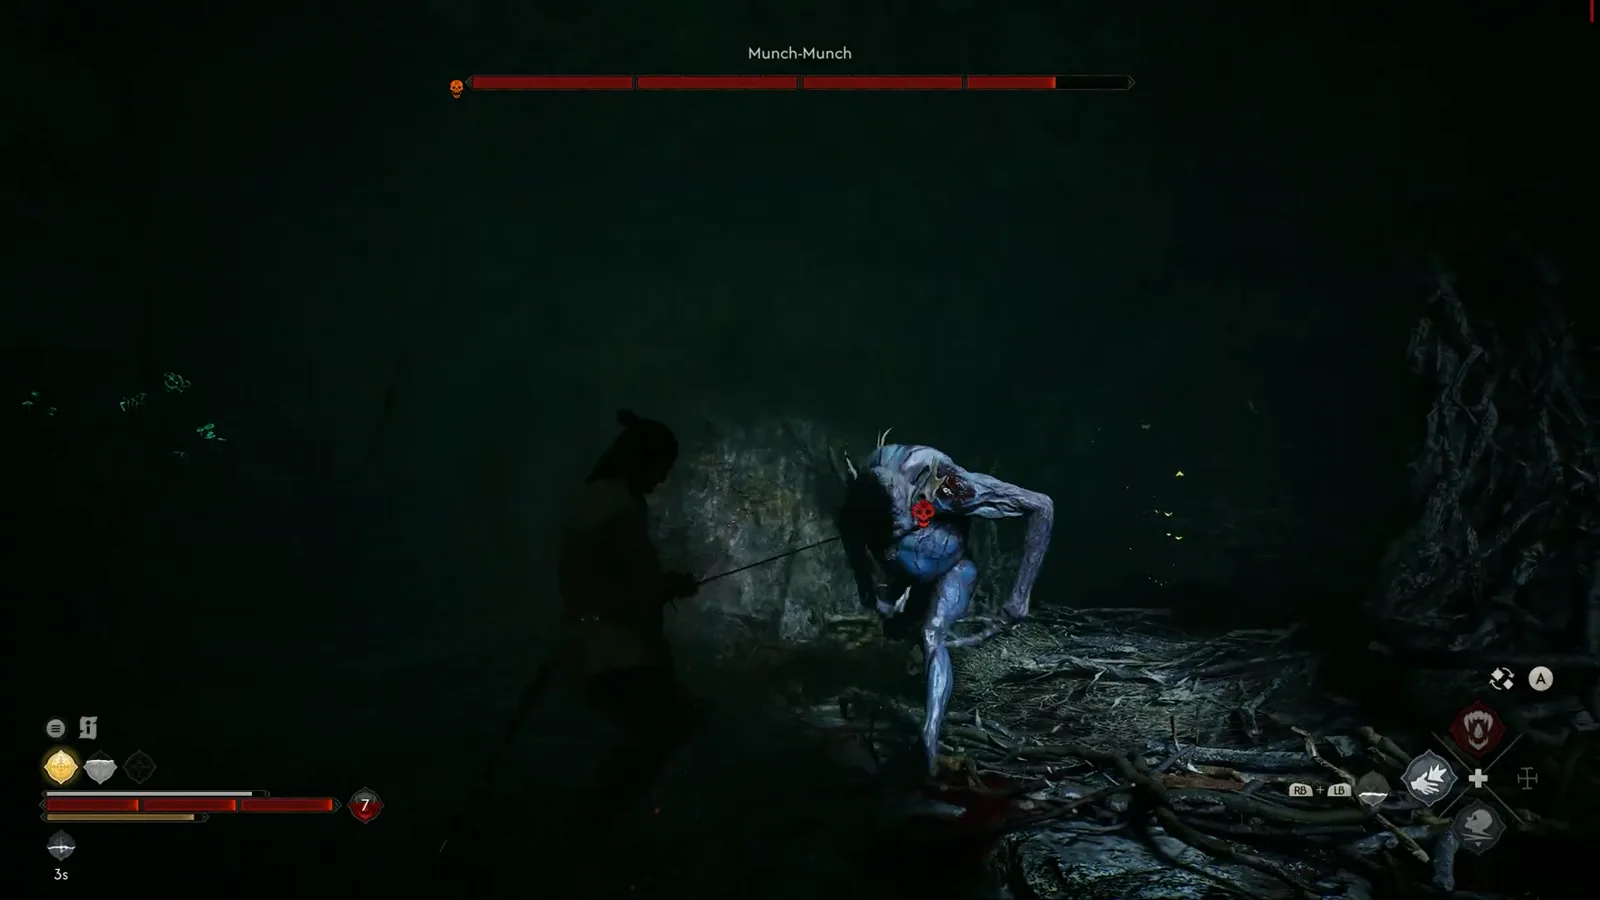
That red skull is the game telling you this swing cannot be parried. Watch the red skull marker at 0:08
The red skull is not a Munch-Munch exclusive, and it is worth knowing the rule rather than the exception: this site’s Essence of Grief capture catches the game stating it on a loading screen — “Some of the enemy attacks cannot be blocked or parried, only dodged. They are indicated by a red skull icon appearing just before the attack.” See /bosses/essence-of-grief/ for that text in full. It applies here too.
How Do You Reach the Cave?
The approach is the best-documented part of this fight, and it is grim. Before the cave mouth there are bodies, and the game makes you look at them. Coen crouches over one and the subtitle reads “Torn out throat, chunks of body missing… A large wild animal could’ve done this.” A moment later: “Judging by the rotting smell, they’ve been dead for some time now.”
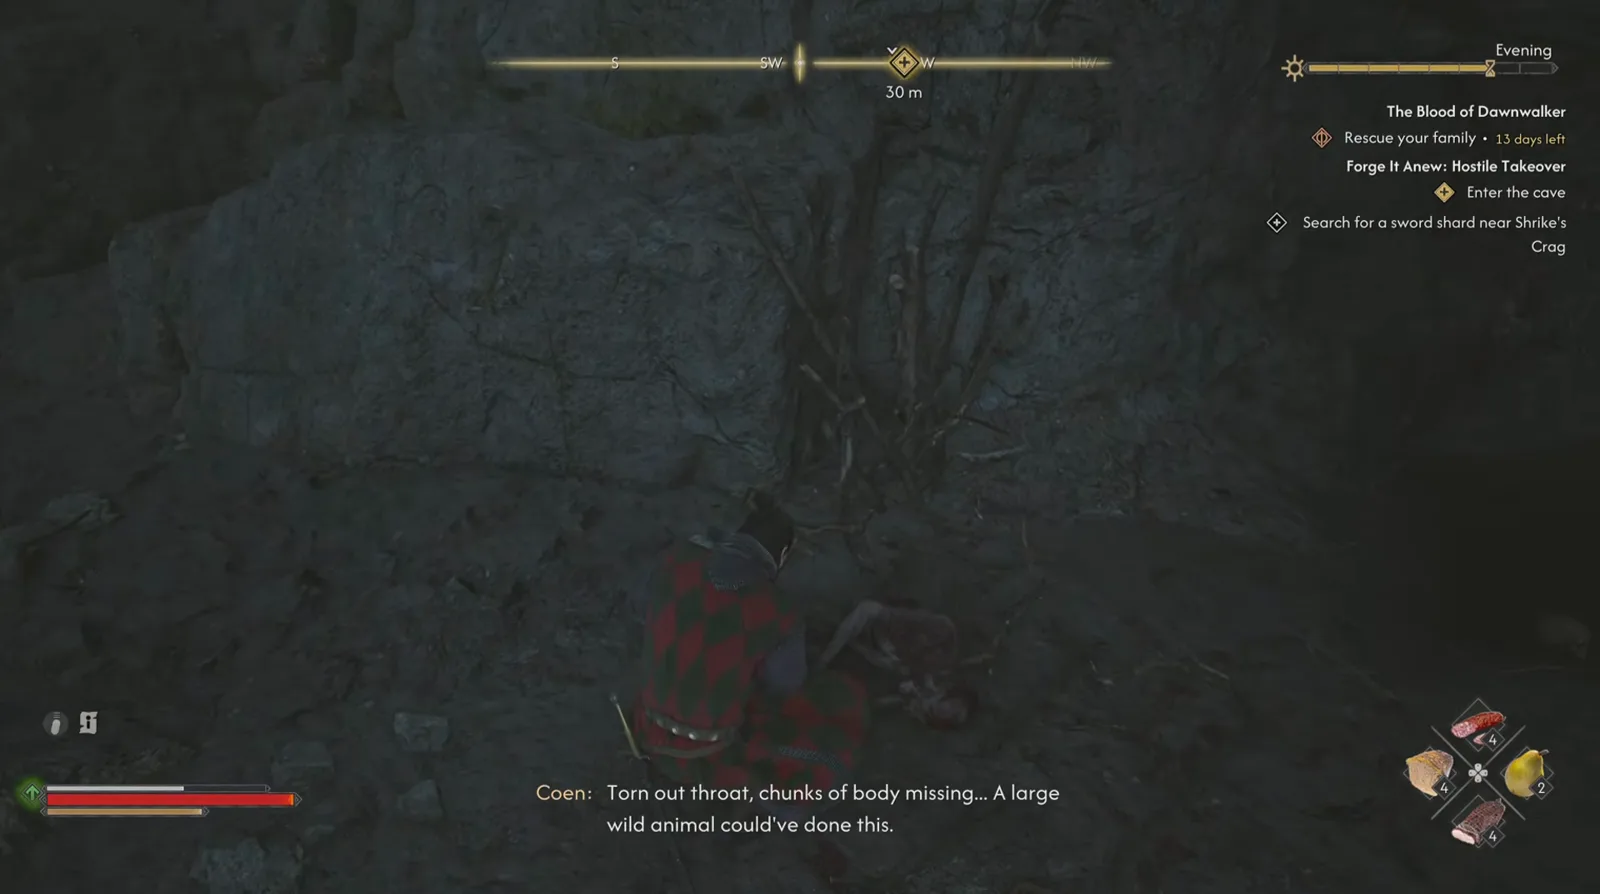
“Enter the cave” is the step; the corpses are the warning. Watch the corpse examination at 0:14
The tracker in that frame is the same quest at an earlier stage — “Enter the cave” instead of “Defeat the monster”, Evening instead of Midnight, and 13 days left on the counter. Two different playthroughs, same objective chain, which is a useful check that the quest structure is stable.
That day counter is the real cost of a bad attempt here. Every reload and every death spends days off the calendar described on /guides/30-day-time-system/, and this is a cave boss you have to physically run into again.
Once inside, the cavern is mapped by the game’s own Focus Mode, and the tracker step becomes “Investigate the cave using Focus Mode • 3” — three things to find. The map it draws is a spread of zigzag mine-workings threaded with blue watercourses.
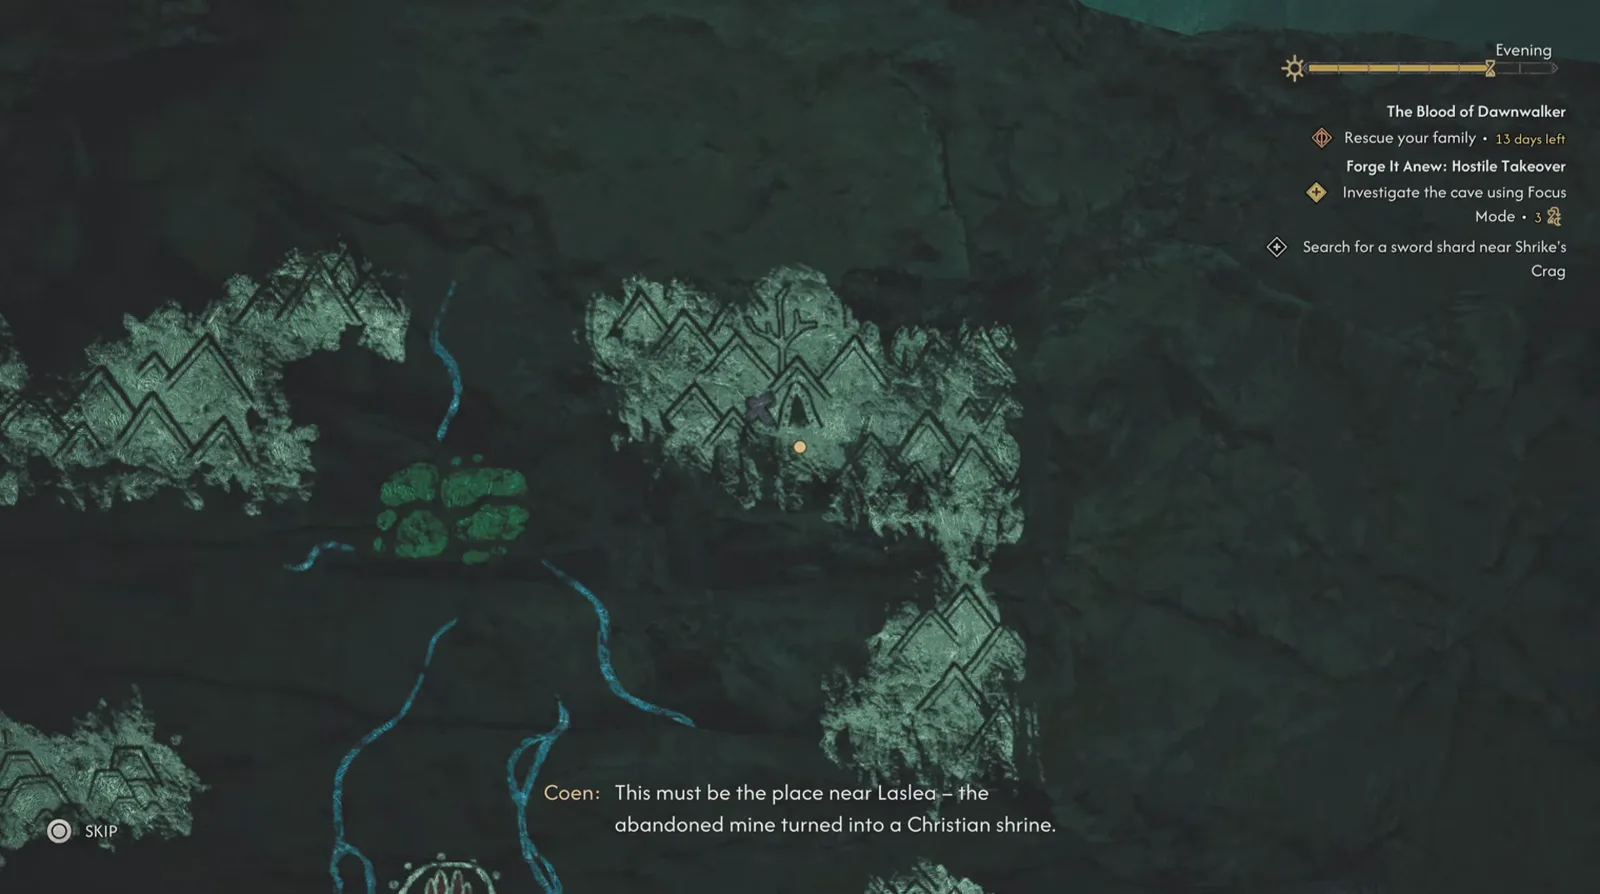
The only frame in these captures that names the site rather than the region. Watch the map scan at 2:52
Coen’s line over that map: “This must be the place near Laslea – the abandoned mine turned into a Christian shrine.” So the honest placement statement is three-tiered — region Rockfalls on screen, shard objective “near Shrike’s Crag” on screen, and “near Laslea” spoken by the character. None of them is a map pin you can fast-travel to in these captures.
What Is the Munch-Munch Boss Fight Like?
It opens with the bar appearing and Coen recognising the situation.
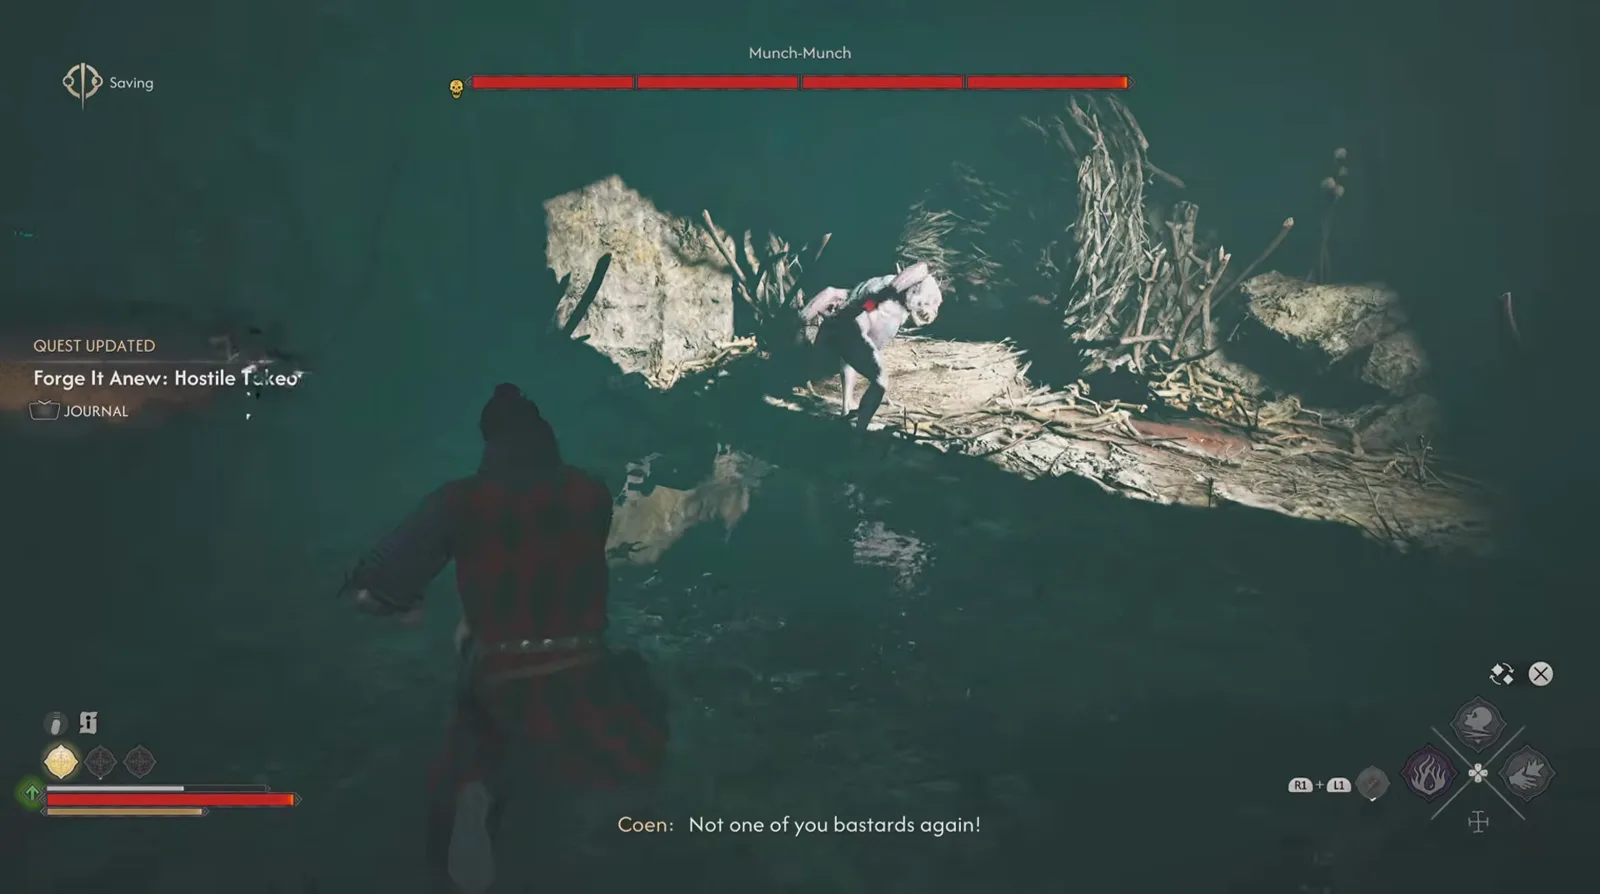
Four segments, one gold skull, and Coen already committed to the charge. Watch the boss bar appear at 1:00
His subtitle on that charge is worth quoting because it reframes the whole encounter: “Not one of you bastards again!” This is not a first meeting, and the mauled bodies outside the cave read as the same grudge.
Mechanically, the captures show a solitary melee brawler — no weapon, both hands free, long reach, and it fights on and around its own nest rather than meeting you in open ground. There is no second add in any frame of either fight, and the red diamond on its torso is the lock-on reticle and nothing more.
The one damage number either capture makes legible is a gold 855, floating over the kobold’s back at 1:36 while it is bent double on the nest, with a spray of red across the twigs behind it. No element glyph and no damage-type icon sit beside the figure.
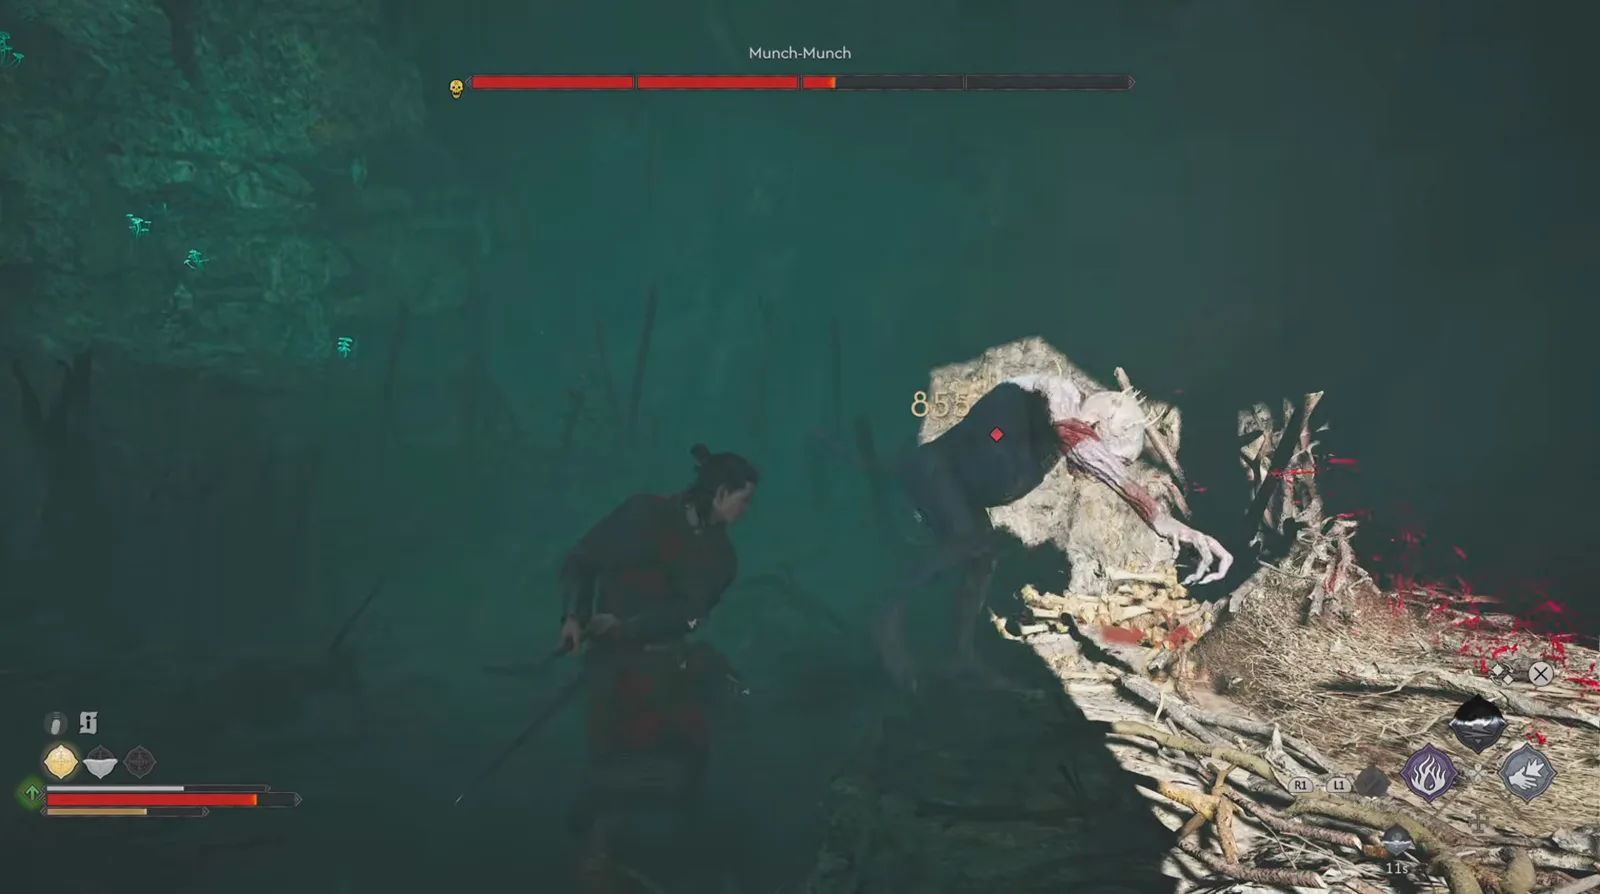
855 off one swing, and the bar is just over half gone. Watch the 855 hit at 1:36
Track the bar across the fight and the shape is a slow, uninterrupted drain: four segments at 1:00, two and a bit at 1:36, a sliver of the first at 2:25. No segment lights up differently, no banner announces anything, the model never changes size or colour. Whatever a wiki eventually decides to call its phases, this footage does not show any. Contrast the unmistakable shift on /bosses/brencis/.
What the last of those three frames does show is how close this runs. Coen’s health bar is down to a short pink stub with a thin yellow portion behind it, the whole screen edge is vignetted red, and one ability on the bottom-right radial is sitting on a 21s cooldown.
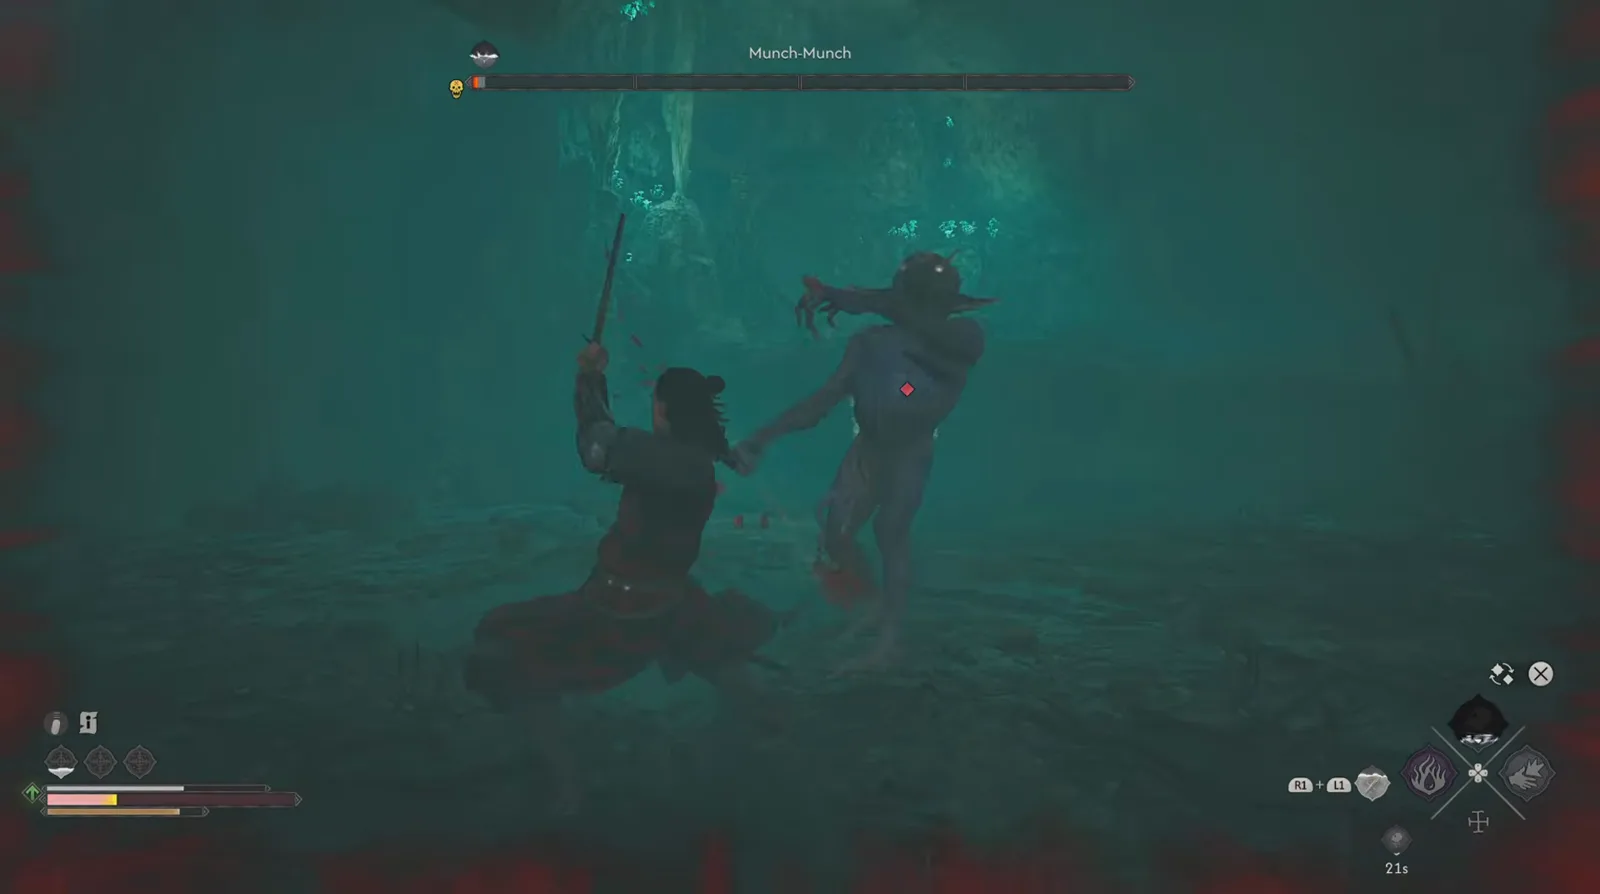
Two and a half minutes in, the bar is nearly gone on both sides — and the kobold is still the one standing upright. Watch the near-death exchange at 2:25
What Does Munch-Munch Drop?
The kill is quiet — no banner, no achievement toast, just the bar gone and Coen exhaling: “Finally… I was afraid for a moment that I’d end up on that pile of corpses.” The tracker step flips to “Investigate the cave using Focus Mode • 3” and a QUEST UPDATED / Forge It Anew: Hostile Takeover card slides in on the left.
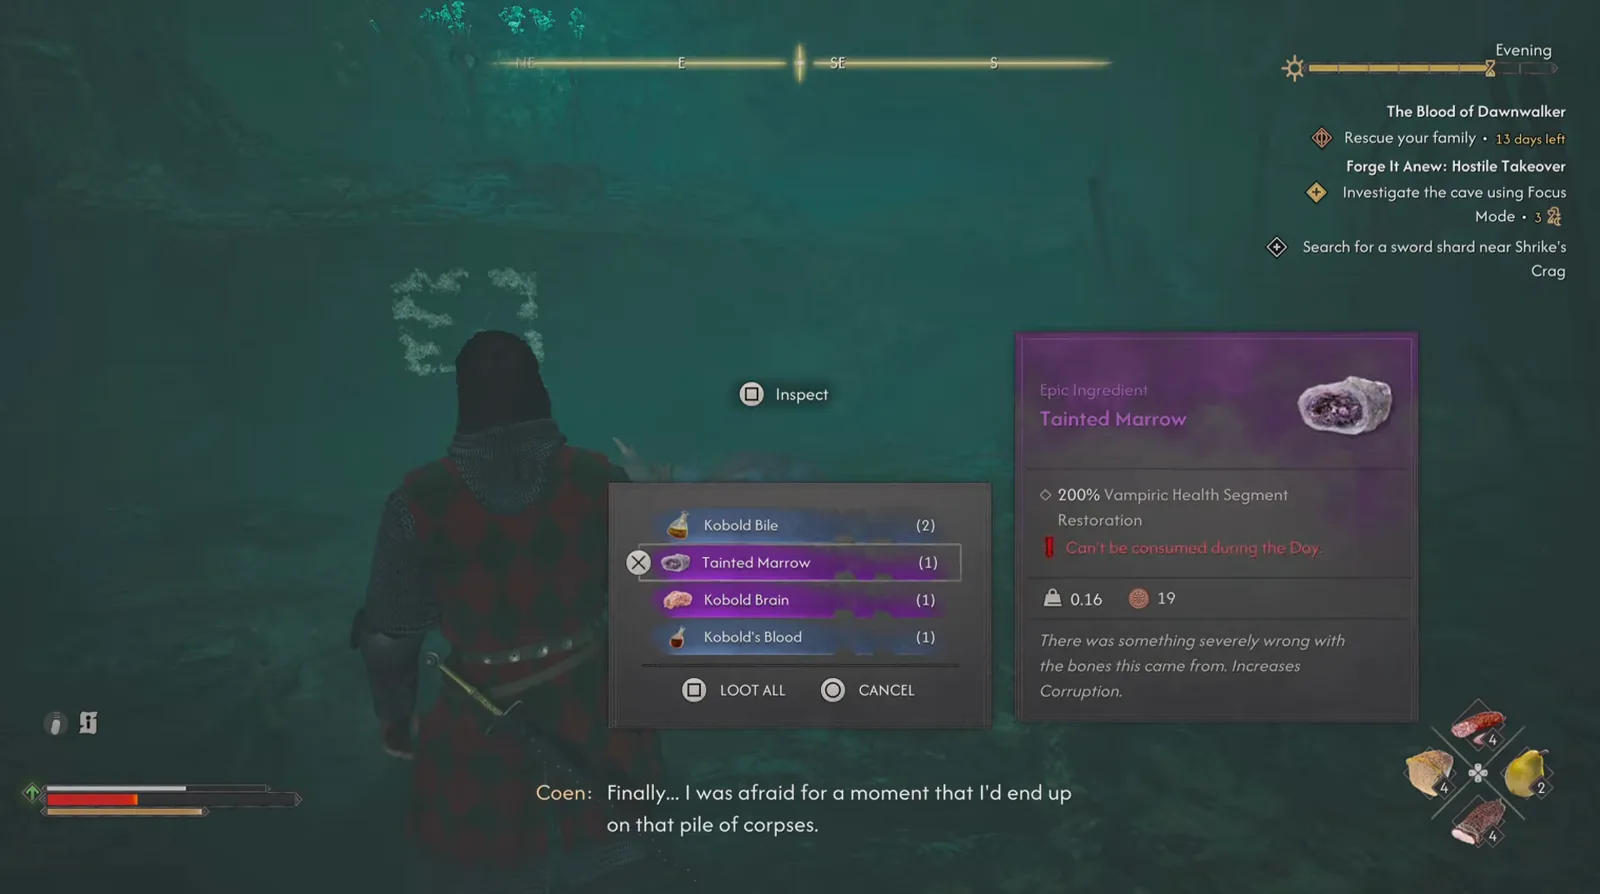
Four lines, three of them named after the species, and the purple one is the reason to bother. Watch the loot panel at 2:33
Read off the panel, in order: Kobold Bile (2), Tainted Marrow (1), Kobold Brain (1), Kobold’s Blood (1), with LOOT ALL and CANCEL beneath. The two purple rows are the valuable ones; the bile and the blood render in the lower rarity colour.
The highlighted tooltip is the one to actually understand before you eat it. Tainted Marrow is classified an Epic Ingredient, effect 200% Vampiric Health Segment Restoration, weight 0.16, value 19, with a red restriction line — “Can’t be consumed during the Day.” Flavour text: “There was something severely wrong with the bones this came from. Increases Corruption.”
That is three separate systems in one item, and this site tracks each of them on its own page: the segment refill is the currency behind /guides/vampire-powers/, the Corruption line is the whole cost model of /guides/corruption-build/, and the day restriction only bites because of the clock explained on /guides/30-day-time-system/. Marrow is an Ingredient, not a weapon or a piece of gear — it belongs in the crafting loop covered on /guides/forging-guide/, not an equipment slot.

The Blood of Dawnwalker - Munch-Munch Boss Fight — Yohanes Aditya
What Do the Paintings in the Nest Say?
This is the part of the capture that makes the fight worth doing rather than skipping. The remaining Focus Mode objectives in the cave are painted figures on the rock, and they tell the story of why Coen is hunting shards here at all.
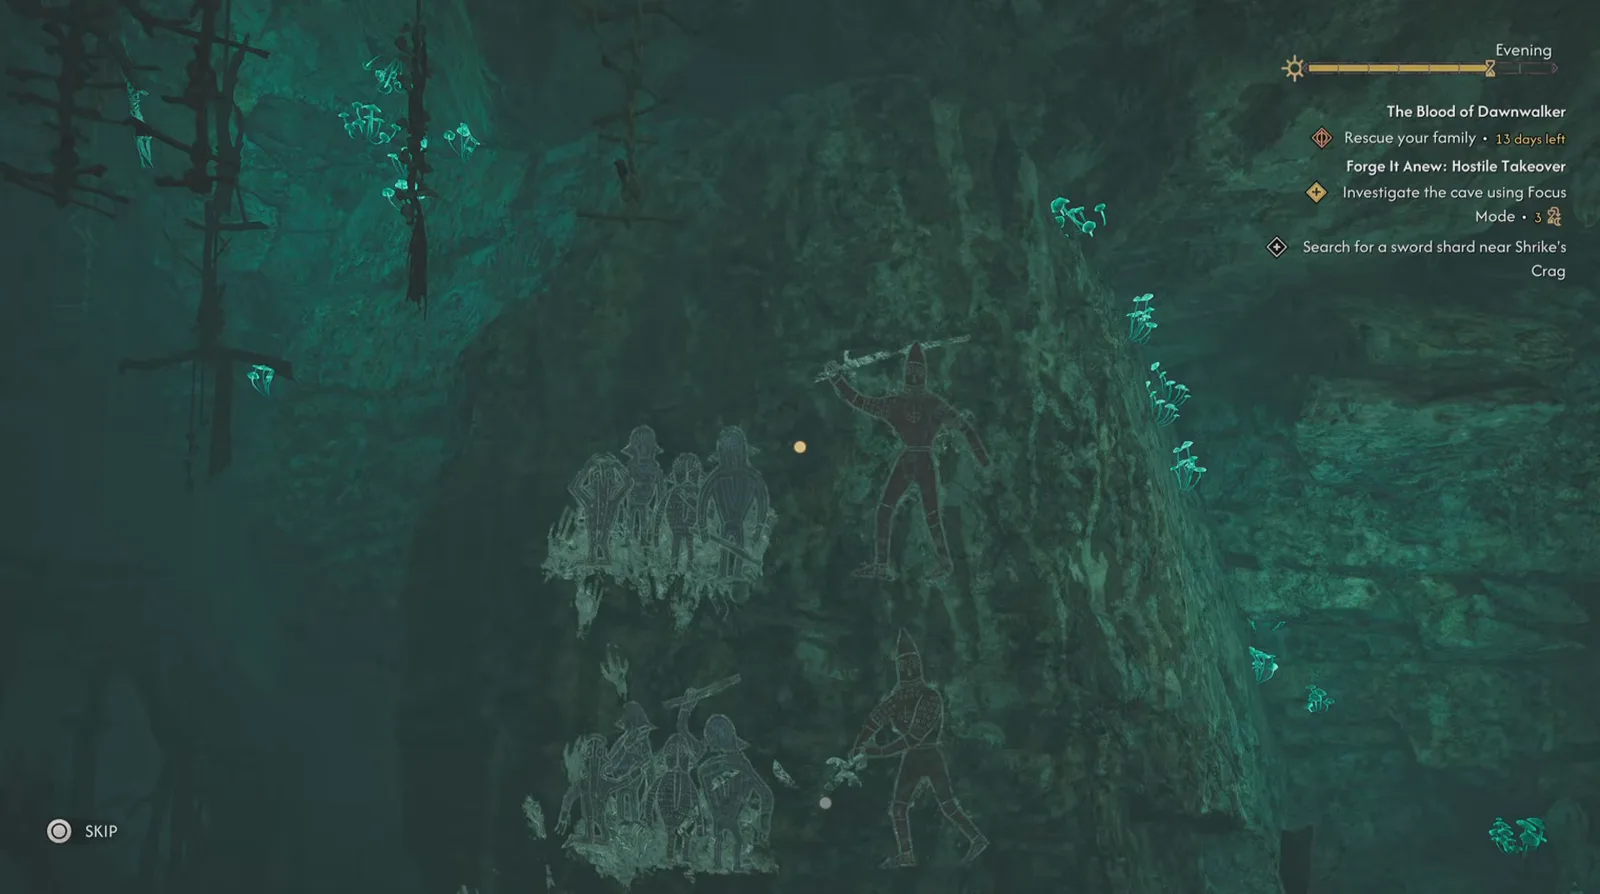
The mural reads as a kobold telling of a losing invasion — one big red fighter, and a lot of small white survivors. Watch the paintings at 3:32
The panels show a tall armoured figure in red with a raised blade, a second red figure below carrying what looks like a broken sword, and clusters of smaller white figures recoiling. Coen’s running commentary, in order: “One of the creatures stood its ground. Seems almost heroic.” Then: “This sword. Could that be Mihai? Dying but making their enemies blade shatter… So Mihai wanted to slay the kobolds, but lost his blade in the process. Unlucky.” And finally: “That’s the last piece of Mihai’s sword. Now to find someone who’s able to reforge it.”
A second creator, in a different playthrough, reads the same wall and reaches the same conclusion: “To fight all those monsters alone, this warrior was impressive indeed. Wait, this sword. Could that be Mihai? Critters are cowering in fear… Mihai must have made quite an impression if they decided to memorialize him.” The caption trails off there. Two independent captures agreeing on the identification is about as good as this kind of lore read gets.
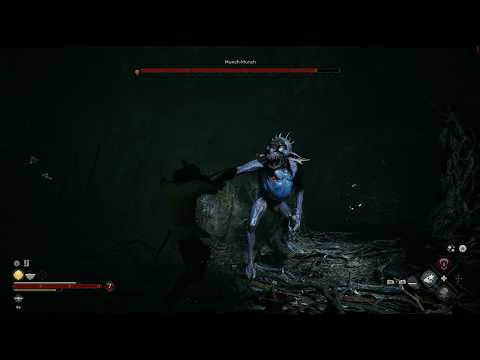
Munch-Munch No Hit Boss Fight — Glarus Gaming

Showcase 15 - Munch Munch Boss, Second Shard — IronCladExile
Sources & Verification
- The Blood of Dawnwalker - Munch-Munch Boss Fight by Yohanes Aditya (295s) — the backbone of this page. Supplies the named four-segment boss bar and its gold skull glyph, the “Not one of you bastards again!” line, the gold 855 damage number, the bar’s drain at three sampled timestamps, the red vignette and low-health state at 2:25, the “Enter the cave” and “Investigate the cave using Focus Mode • 3” tracker steps, the corpse-examination subtitles, the Focus Mode map with the Laslea line, the QUEST UPDATED banner, the complete four-line loot list with the Tainted Marrow tooltip, and the mural sequence with Coen’s Mihai commentary. Seven of the nine screenshots come from this video.
- Munch-Munch No Hit Boss Fight by Glarus Gaming (50s) — the only capture that shows the Rockfalls region tag, and the source of the red skull marker frame and the “Defeat the monster” tracker step. Also the cleanest look at the creature model, and the reason this page can say anything at all about difficulty: it ends in under a minute with Coen at level 7.
- Showcase 15 - Munch Munch Boss, Second Shard by IronCladExile (~27 min) — used for narration only, no frames. The one stretch sampled for stills is its 18:00–19:00 approach: the game’s own map screen, then a daytime run up through the trees to the cave mouth. That is a different playthrough from the other two — 25 days left on the counter, a different tracker chain (“Forge It Anew / Search for an uriashi blacksmith / Find other sword shards”) — so its frames are deliberately not mixed in here rather than presented as one run. What it does contribute is the route note (ridge, wolves, cave), the “third attempt” difficulty statement, and the poison-spit description quoted above.
- These three captures are the complete footage set consulted for this page. No wiki was used for any claim on it — every placement, drop and mechanic statement above is anchored to on-screen UI text or to a subtitle, and where a fact exists only in a creator’s spoken commentary it is labelled as such.
More Rockfalls and Kobold Boss Guides
- The Rockfalls neighbour, a wraith inside Isbrand’s memory: /bosses/essence-of-grief/
- The knight the cave paintings are about: /bosses/mihai/
- The feral-beast fight to compare the footwork against: /bosses/ravenous-bear/
- A duel where the parry-and-punish loop this boss rewards is spelled out: /bosses/bloodletter/
- The red spectral adversary that shares the unblockable red-skull rule: /bosses/echo/
- Why a death here costs days and not just a try: /guides/30-day-time-system/
- What “Increases Corruption” is actually charging you for: /guides/corruption-build/
- The segment-restoration economy Tainted Marrow plays into: /guides/vampire-powers/
- Every documented encounter, indexed: /bosses/
関連記事
bosses
The Bloodletter Boss Guide: Ambrus's Collectors Duel in Briar Sloughs
Beat The Bloodletter in The Blood of Dawnwalker: the Briar Sloughs leech-barrel camp, his dual-sword duel, the wipe that opens it, and the Blood Leeches he drops.
bosses
Essence of Grief Boss Guide: The Blood of Dawnwalker Memory Fight
Beat the Essence of Grief in The Blood of Dawnwalker: the red apparition inside Isbrand's memory, her unblockable red-skull attacks, and the exact loot.
bosses
Rayko the Incorruptible Boss Guide: Under Watchful Eyes at Stoneward Post
Beat Rayko the Incorruptible in The Blood of Dawnwalker: the Stoneward Post cellar duel during Under Watchful Eyes, his overhead swings, and the loot he drops.
この攻略は役に立ちましたか?
フィードバックありがとうございます!