Essence of Grief Boss Guide: The Blood of Dawnwalker Memory Fight
Beat the Essence of Grief in The Blood of Dawnwalker: the red apparition inside Isbrand's memory, her unblockable red-skull attacks, and the exact loot.
FAQ
Where do you find the Essence of Grief in The Blood of Dawnwalker?
Does the Essence of Grief have phases?
What does the Essence of Grief drop?
How do you handle the Essence of Grief's red skull attacks?
Who is Lacra in this encounter?
What Is the Essence of Grief in The Blood of Dawnwalker?
The Essence of Grief is the name the game’s own boss bar prints, centred above a single long steel-blue track with a small gold skull glyph at its left end. She is not a person in armour you can read a face on: every frame the capture gives shows a tall, glowing red apparition of a woman in a long tattered gown, hair pinned up, fighting with a slender one-handed blade. She is one of the spectral adversaries indexed on /bosses/, and visually she sits closer to the red wraith on /bosses/echo/ than to any of the duellists.
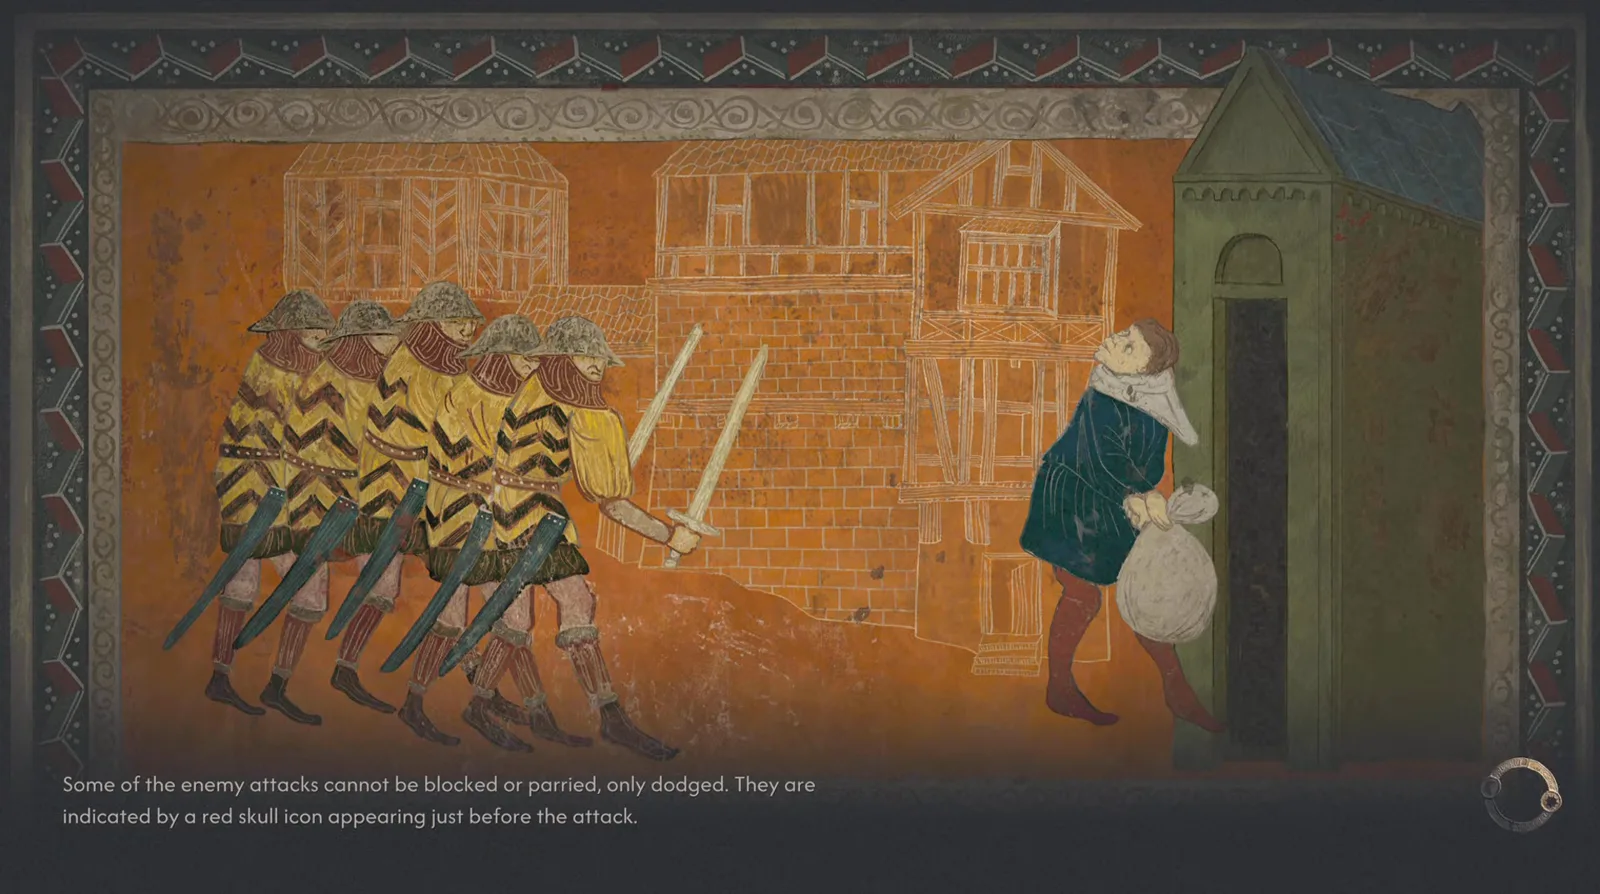
The game states the governing rule outright, on the screen you pass through on the way in. Read the loading tip at 0:02
That loading screen matters more here than it would anywhere else, because it is the only explanation of the fight’s central mechanic the capture contains. Its full text: “Some of the enemy attacks cannot be blocked or parried, only dodged. They are indicated by a red skull icon appearing just before the attack.” Everything else on this page is inference from pictures.
The opening frame already shows the rule working. The named bar sits at the top of the screen, and a separate shorter red health bar floats at whoever Coen is locked onto — with a red skull marker burning under it.
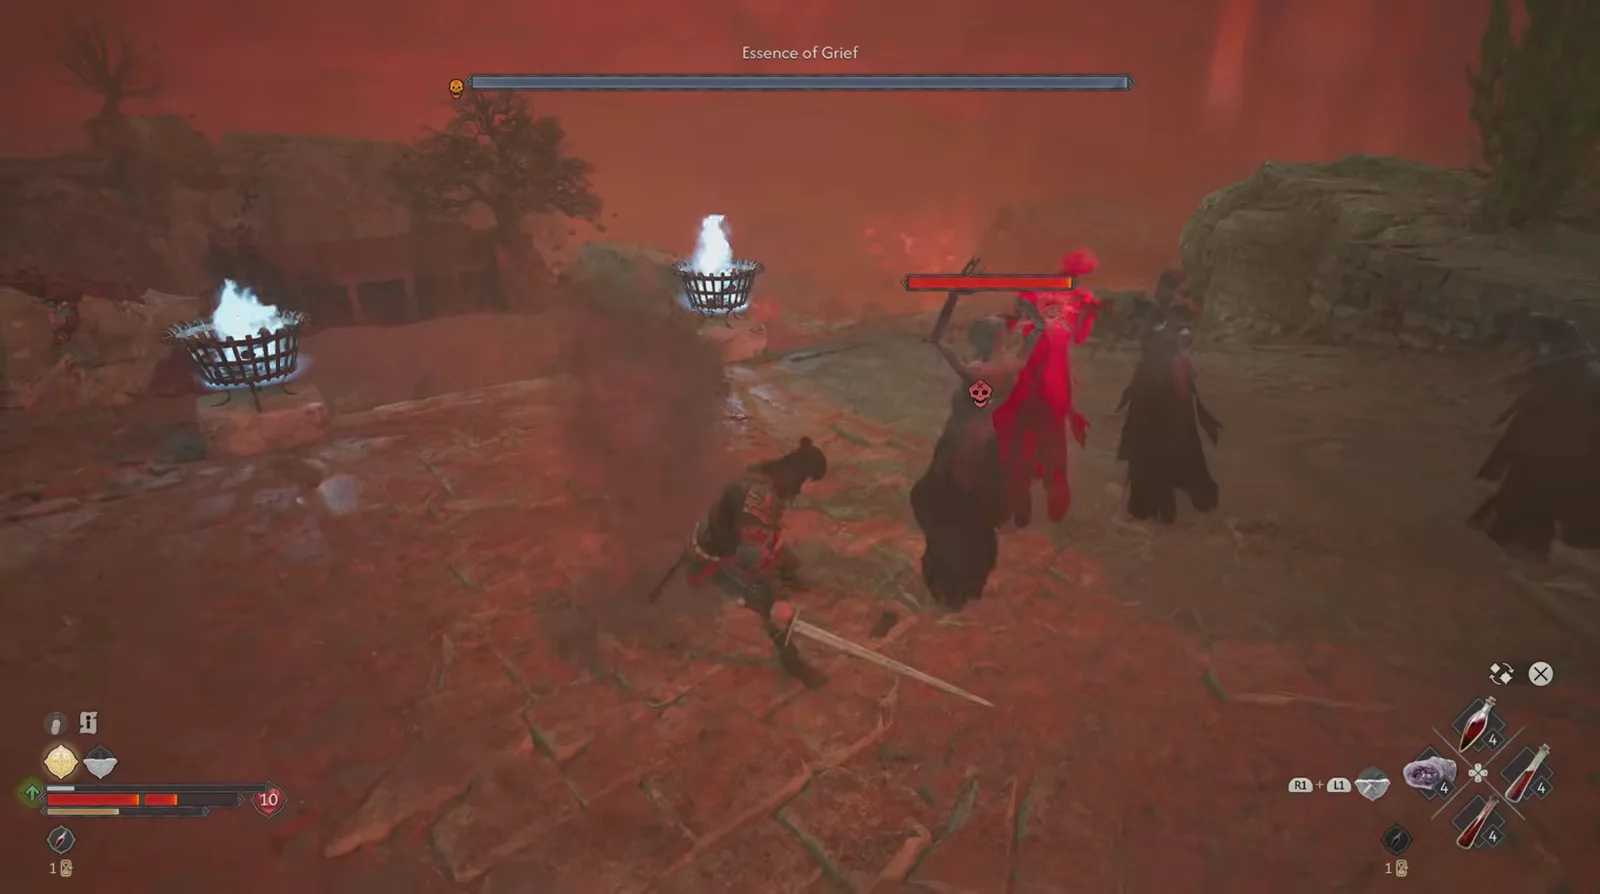
Two bars, two jobs: the named bar at the top, the red target bar on the figure you are actually hitting. Watch the opening exchange at 0:24
Note what the capture does not show. It opens on a loading screen, and by 0:16 the duel is already running — there is no approach, no trigger, and no cutscene establishing why you are here.
How Do You Enter Her Memory?
The tracker does all the orientation, and it is unusually specific. Read off the frame at 4:41, top-right: the time-of-day label Wee Hours above a moon-and-hourglass day bar, then the main quest The Blood of Dawnwalker with the step “Rescue your family • 19 days left”, then the side quest Our Rotten Roots with “Search for Isbrand’s memories • 4”, and under that the highlighted objective “Enter the sandstorm” with R3 CHANGE OBJECTIVE beneath it.
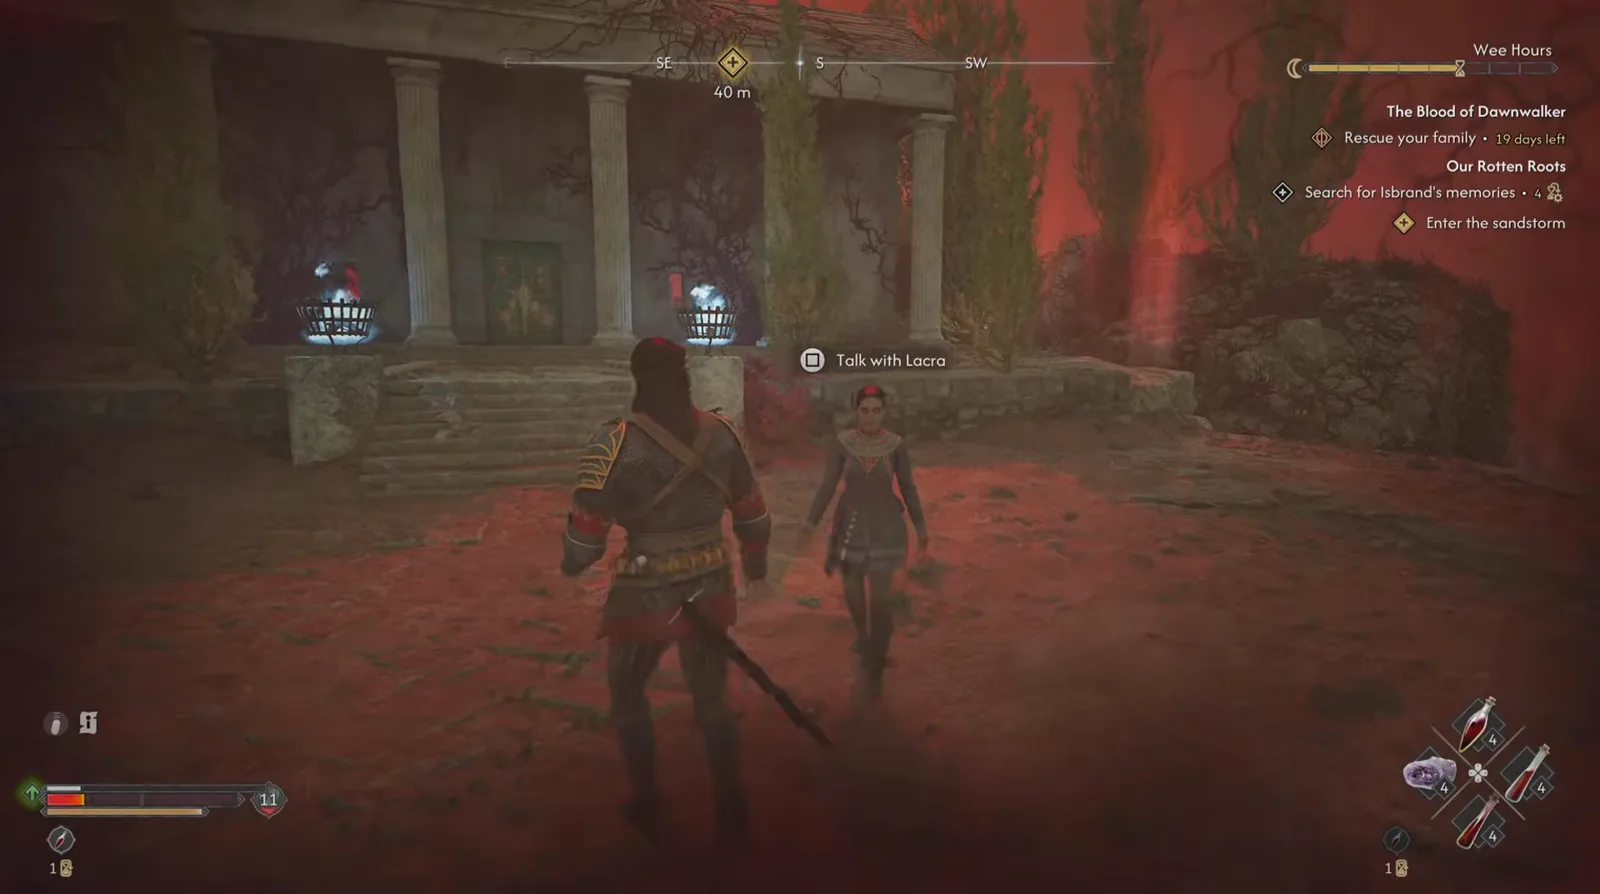
The memory does not end with the kill — it ends when you finish talking. Watch the tracker and Lacra’s prompt at 4:44
Two things follow from that panel. The 19 days left counter is the calendar this site breaks down on /guides/30-day-time-system/ — every reload, every failed attempt and every conversation inside this memory spends real days off it, so this is not a boss to farm casually. And the “Search for Isbrand’s memories • 4” counter tells you the fight is one stage inside a multi-part sequence, not a location you walk back to.
The arena itself is consistent with that: a rocky plateau under red haze, chunks of stone hanging in the air, iron braziers burning a pale blue-white flame, and a ruined temple with columns and steps at one edge. It is not a place; it is a set.
What Is the Essence of Grief Boss Fight Like?
A one-on-one duel against a blade-carrying wraith, in the open, on flat rock — and the defining constraint is the red skull rule. She is clearly visible winding up attacks with the marker on her at 0:24, which means parrying is not an option against those swings no matter how good your timing is.
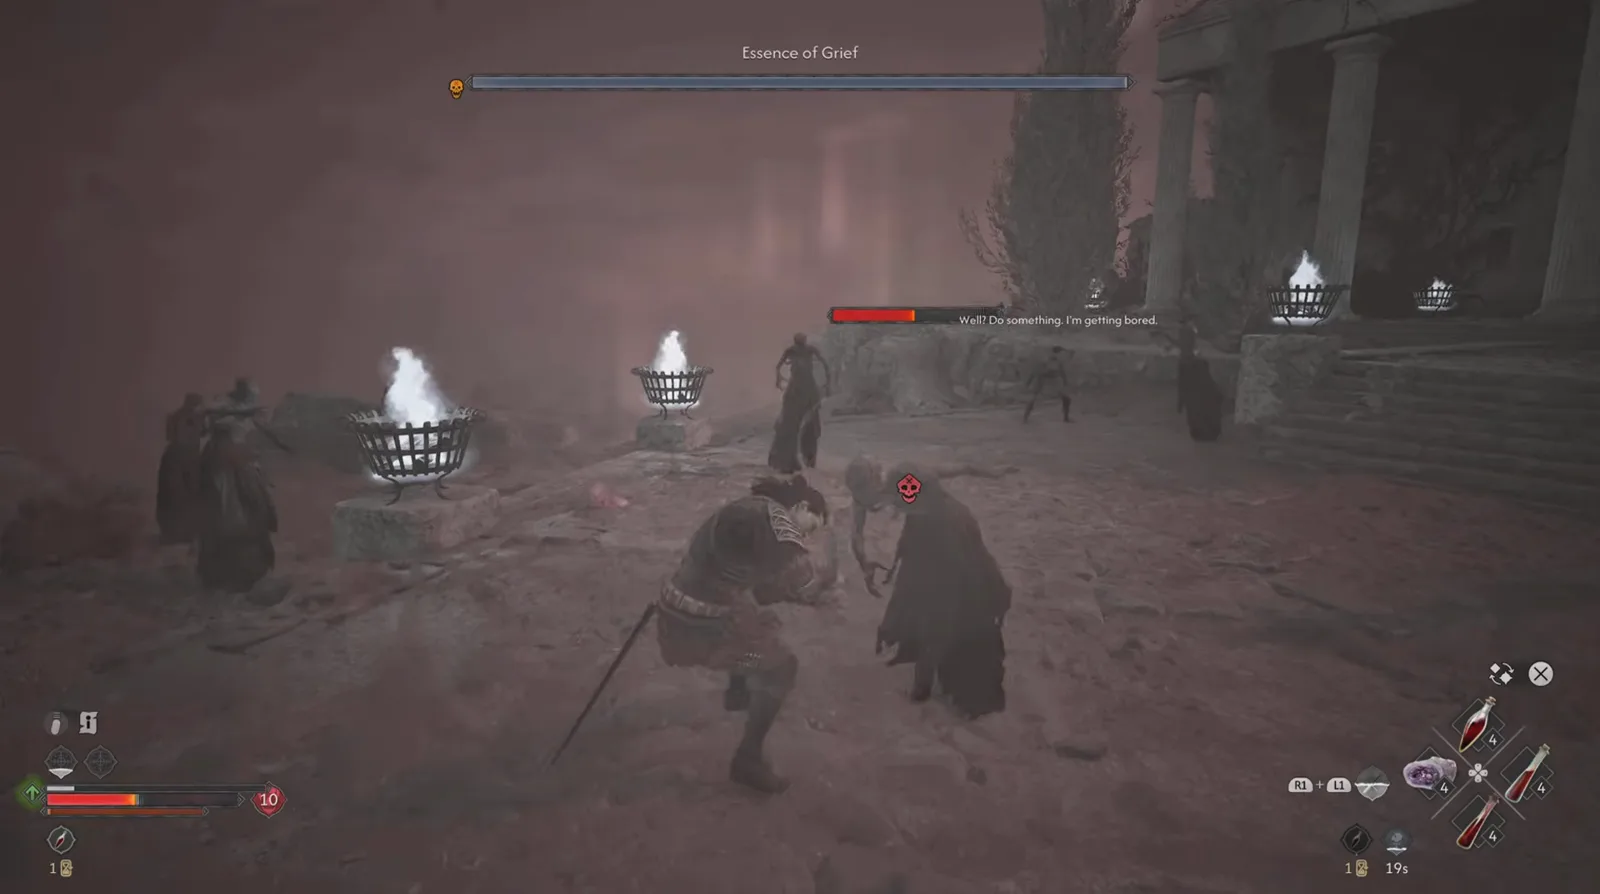
The colour drains out of the whole arena at intervals, and the taunt lands over a red target bar. Watch the grey phase at 0:40
That frame carries three separate pieces of information. The plateau has gone grey — the capture passes through stretches with the colour drained out (around 0:40 to 1:00, and again near 3:00) and sits saturated red for most of the fight, with no banner or readout marking either state. There are other figures in the arena: robed shapes, at least one with its own red target health bar and its own red skull marker, which the capture never labels as summons or as pre-placed. And a subtitle reads “Well? Do something. I’m getting bored.” — the speaker is not named on screen, so this page does not name her either.
The only clean damage readout on the boss herself is a white 350 with a plain diamond target marker over her chest, from an ordinary sword swing. No element glyph, no crit styling, no status word attached.
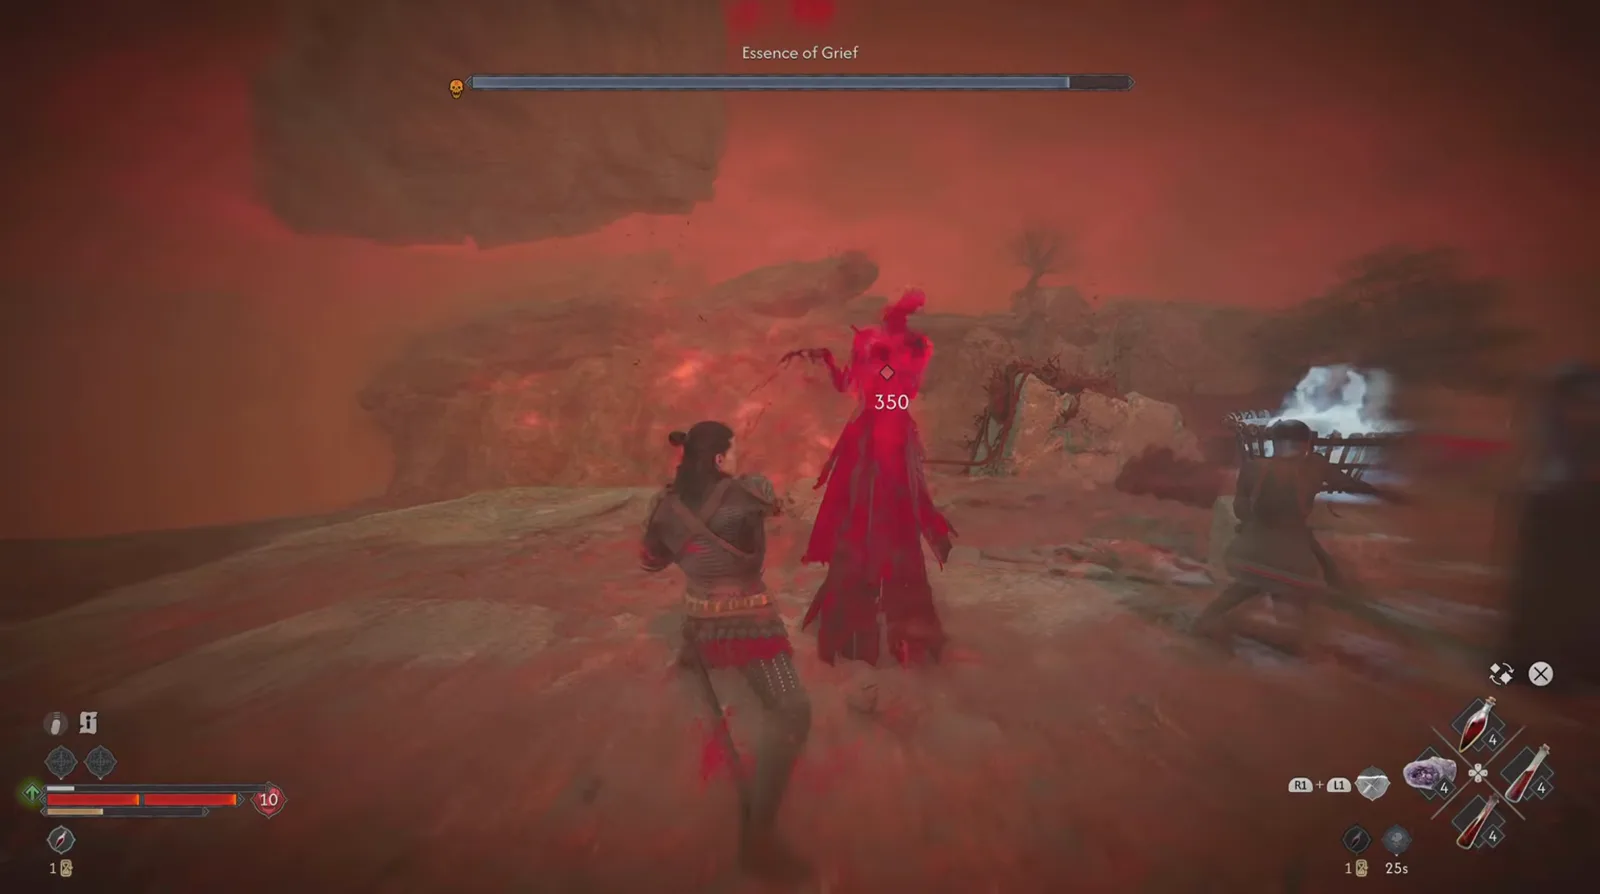
The capture’s single legible hit on her: a plain 350, no damage-type icon beside it. Watch the 350 at 1:40
She also has a ranged option. At 3:40 a red fireball is caught in flight across the upper left of the frame while she stands mid-ground with one arm extended toward Coen — the same “only dodged” family of threat, arriving from range rather than from the sword.
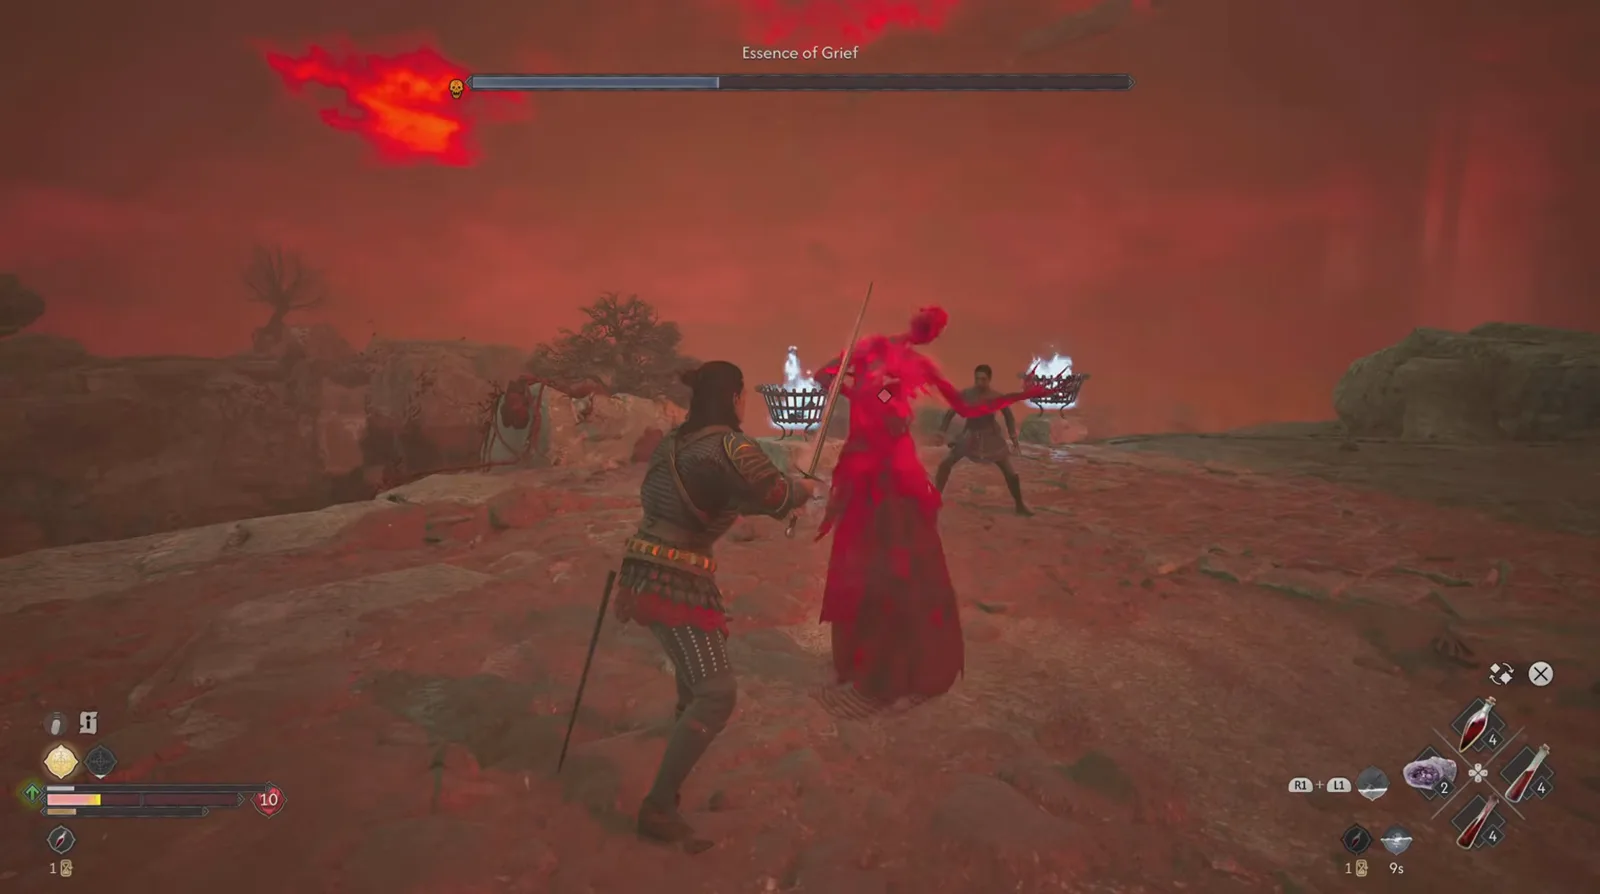
Her ranged attack, caught mid-flight — and Coen’s own health bar is already low in this frame. Watch the fireball at 3:40
Tracking the bar across the whole fight is the most useful thing this capture does, because it is a negative result. The bar is one continuous track with no segment ticks at all, and it falls smoothly: full at 0:18 and 0:40, roughly 85% at 1:40, roughly 70% at 2:10, roughly 42% at 3:40, roughly 25% at 4:10, roughly 15% at 4:22. Nothing changes when it crosses those thresholds — no new attack set, no transformation, no phase banner. Compare the deliberate phase design on /bosses/brencis/, where the shift is unmistakable.
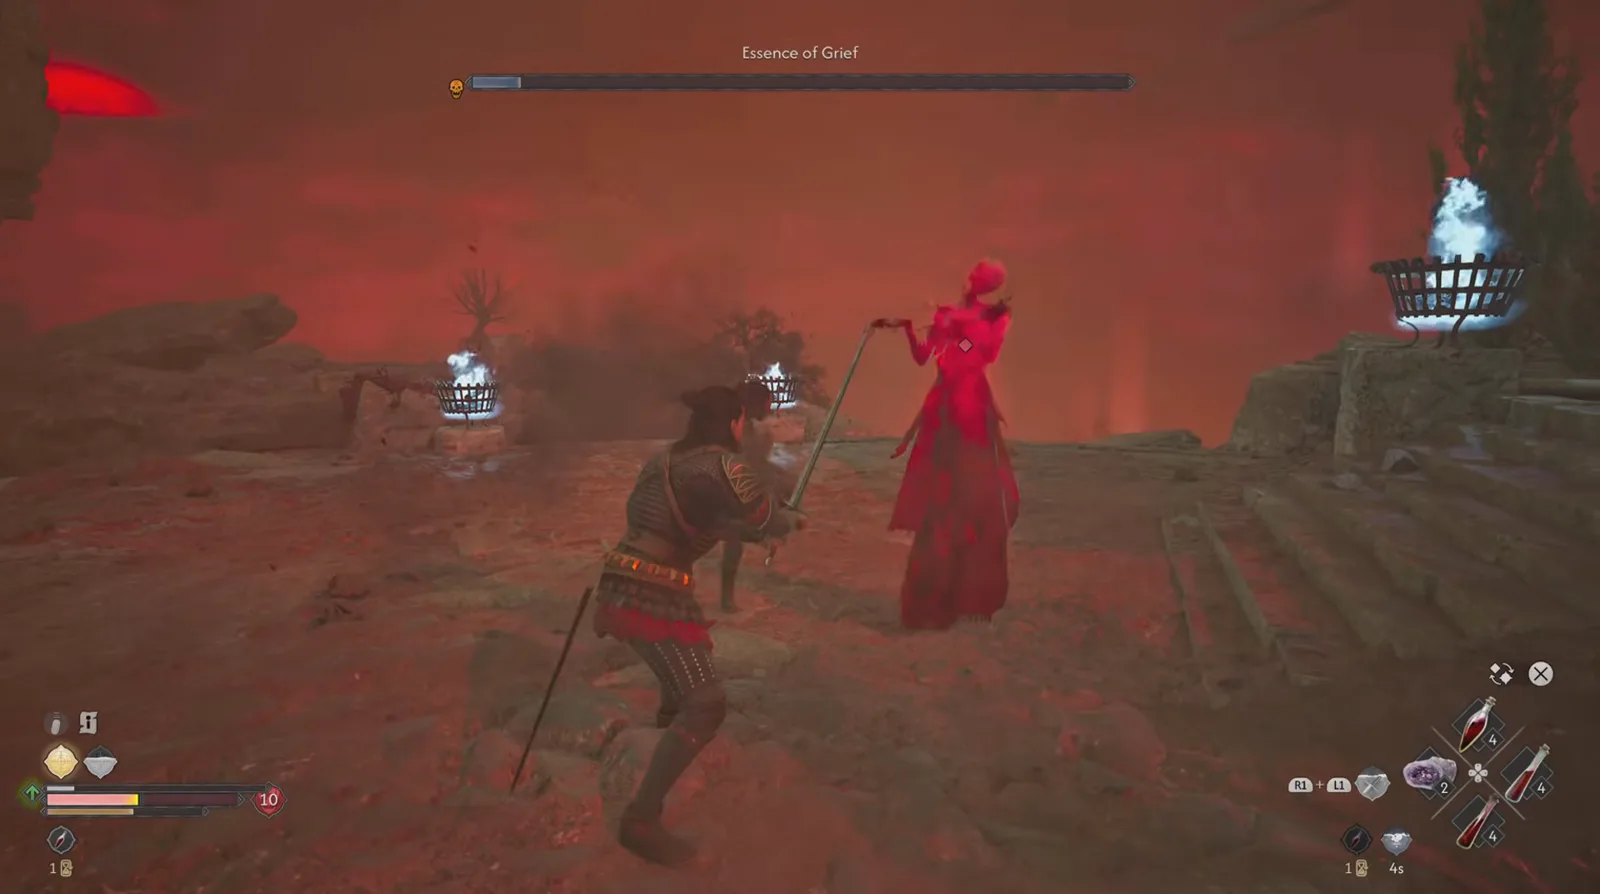
This is as clear a look as the capture gives: a gown, a thin sword, and a great deal of red. Watch the portrait at 4:26
The practical read from the footage is therefore simple and unglamorous: this is an attrition fight with one hard rule. Watch for the red skull, dodge toward rather than away, and spend the long non-skull windows on her back — the 350 frame is taken from exactly that position. For the general parry-and-punish loop this site recommends against the named duels, see /bosses/bloodletter/, and for the baseline defensive habits, /guides/beginner-guide/.
What Does the Essence of Grief Drop?
The kill is unmistakable on screen. She fades from red to a pale ash-grey form, a hollow burst opens in her chest, and red fragments scatter upward — while two banners stack over her: CORRUPTION RISES and New Vampiric Powers Available, with three hexagon icons (the middle one lit red, the outer two still showing question marks) and a SHOW prompt.
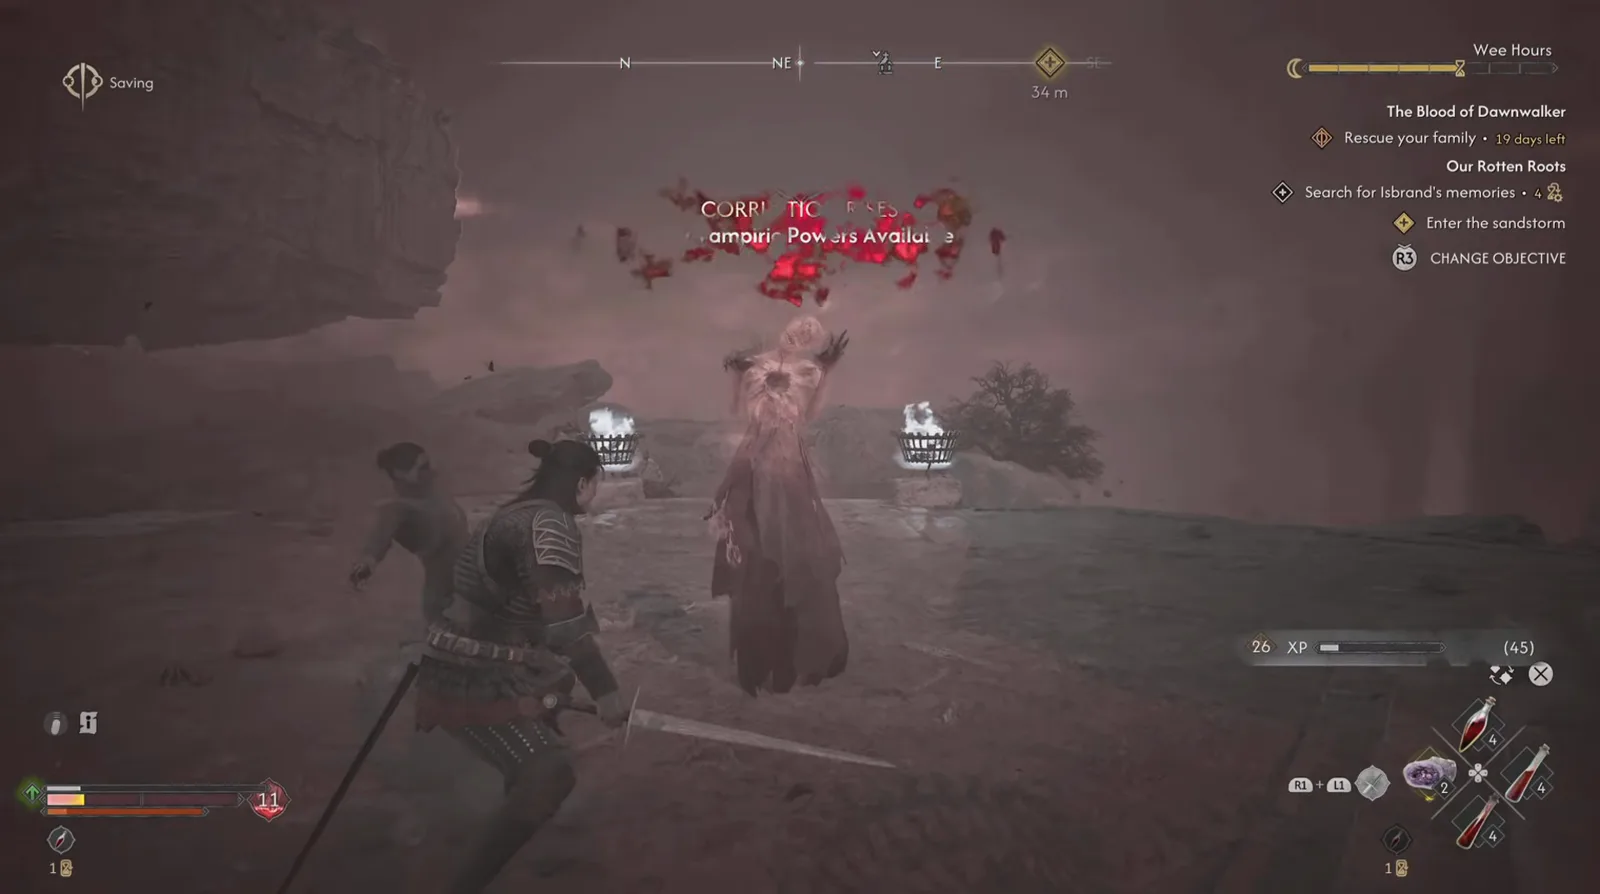
She goes grey and comes apart at the chest; the badge on Coen’s health bar ticks from 10 to 11. Watch the kill banner at 4:32
That banner pair is the two economies this site tracks separately: Corruption is the whole cost model of /guides/corruption-build/, and “New Vampiric Powers Available” is the unlock feed behind /guides/vampire-powers/. The 11 printed above the banner is the same number that appears in the red diamond at the end of Coen’s health bar — 10 throughout the fight, 11 after the kill — so it is his level here, not a recommendation about her.
Then the body, and this is where the capture is worth more than any summary:
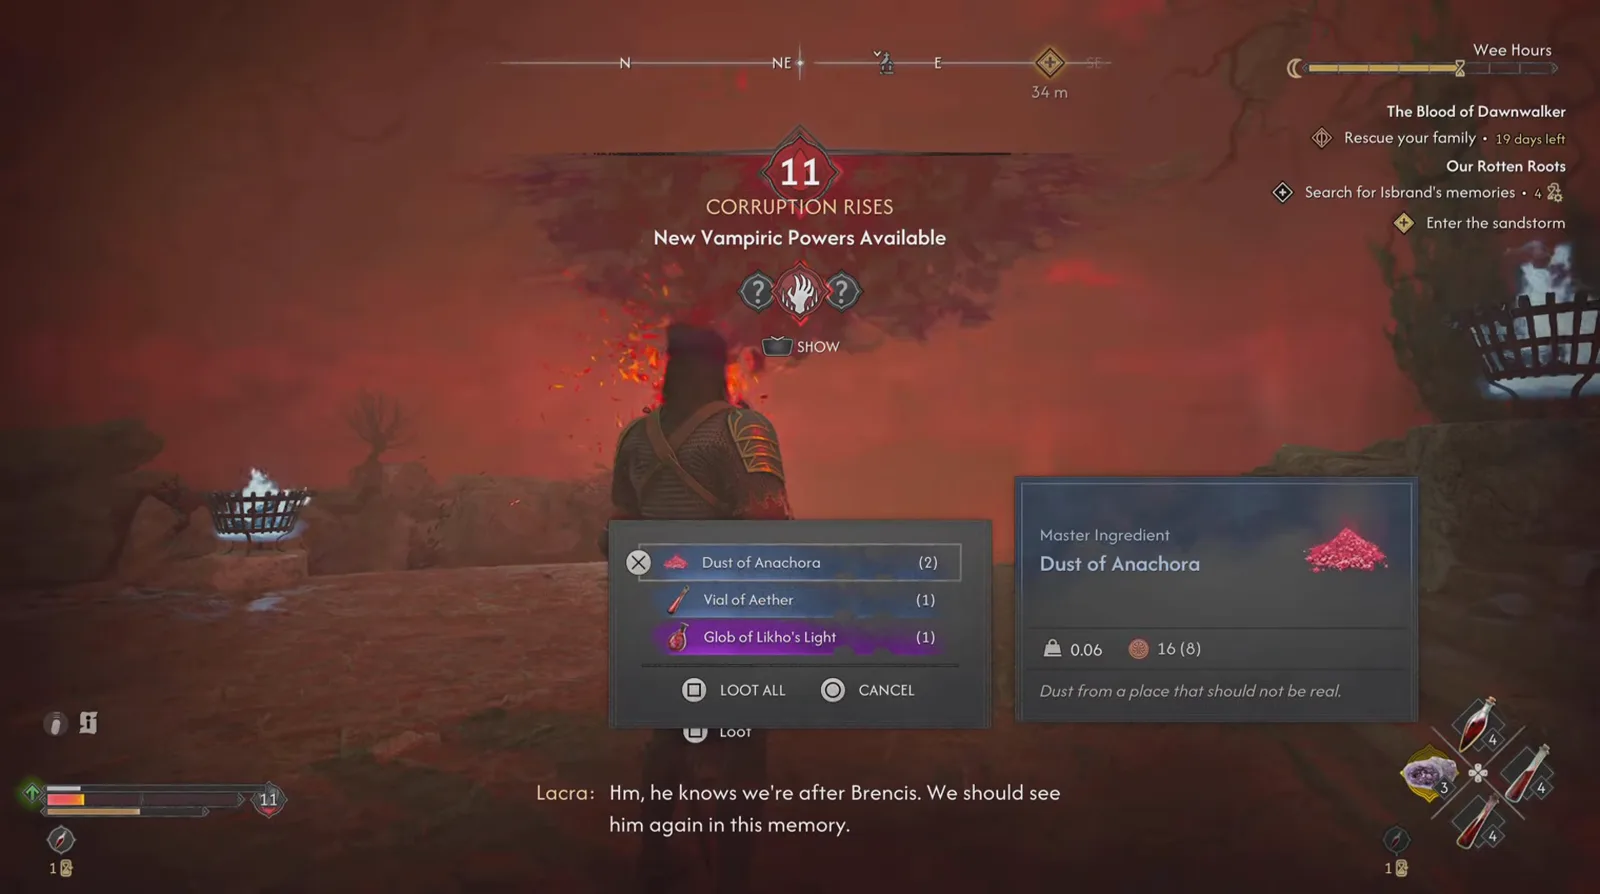
Three lines, and the tooltip calls the dust an ingredient rather than a weapon. Watch the loot list at 4:36
Read off the panel: Dust of Anachora (2), Vial of Aether (1), Glob of Likho’s Light (1), with LOOT ALL and CANCEL underneath and a Loot prompt below that. The highlighted tooltip classifies Dust of Anachora as a Master Ingredient, weight 0.06, value 16 — a second parenthesised figure sits beside the value that this capture does not render sharply enough to read — with the flavour line “Dust from a place that should not be real.”
That ingredient classification is the useful takeaway. Master Ingredients belong to the crafting loop documented on /items/forging-materials-guide/, not to a weapon slot, so these are materials to bank rather than gear to equip. The subtitle running under the same frame — “Lacra: Hm, he knows we’re after Brencis. We should see him again in this memory.” — is also the capture’s clearest statement of what these memories are for: it names the boss covered on /bosses/brencis/, and it confirms Lacra is travelling with Coen, which makes her one of the companions catalogued on /guides/companions/.

The Blood of Dawnwalker - Essence of Grief Boss Fight — Yohanes Aditya
Sources & Verification
- The Blood of Dawnwalker - Essence of Grief Boss Fight by Yohanes Aditya — the sole footage source for this page, and the only clean full-fight capture found. It supplies the loading-screen unblockable rule, the named boss bar and its gold skull glyph, the bar’s continuous drain across ten sampled timestamps, the red skull markers on the boss and on a robed figure, the 350 damage number, the fireball, the grey-to-red arena states, the “Well? Do something” subtitle, the CORRUPTION RISES and New Vampiric Powers Available banners, the level badge change, the complete three-line loot list with the Master Ingredient tooltip, the tracker text and the “Talk with Lacra” prompt. All nine screenshots are captured from this video (see the kill banner at 4:32 and the loot list at 4:36).
- The Blood of Dawnwalker - Essence of Grief Boss Fight by the same channel — a 111-second cut of the same encounter. Checked and dropped: it adds no timestamp the longer capture does not already cover, and its audio track carries no narration worth transcribing.
- Fextralife — Essence of Grief — consulted for two things only: the Rockfalls / north of Westridge Outpost placement and the quest name “A Pilgrimage for Power: Dark-Thing”, neither of which this capture shows. It independently lists the same three drops read off screen — Dust of Anachora, Vial of Aether, Glob of Likho’s Light — which is the strongest corroboration on this page. Its five attack names are reported above as unverified against footage, and it publishes no HP, weakness or level figure either.
More Rockfalls and Memory Boss Guides
- The Rockfalls neighbour, a corrupted Kobold in a nest in the north of the region: /bosses/munch-munch/
- Another red spectral adversary, for comparison on wraith-type fights: /bosses/echo/
- The duel that Lacra’s line points this memory at: /bosses/brencis/
- A nearby Ambrus operation with the same timed-objective structure: /bosses/bloodletter/
- Why “19 days left” is the real cost of a failed attempt: /guides/30-day-time-system/
- What CORRUPTION RISES is actually charging you for: /guides/corruption-build/
- The unlock feed behind “New Vampiric Powers Available”: /guides/vampire-powers/
- Every documented encounter, indexed: /bosses/
Related Articles
bosses
The Bloodletter Boss Guide: Ambrus's Collectors Duel in Briar Sloughs
Beat The Bloodletter in The Blood of Dawnwalker: the Briar Sloughs leech-barrel camp, his dual-sword duel, the wipe that opens it, and the Blood Leeches he drops.
bosses
Rayko the Incorruptible Boss Guide: Under Watchful Eyes at Stoneward Post
Beat Rayko the Incorruptible in The Blood of Dawnwalker: the Stoneward Post cellar duel during Under Watchful Eyes, his overhead swings, and the loot he drops.
bosses
Munch-Munch Boss Guide: The Rockfalls Kobold in The Blood of Dawnwalker
Beat Munch-Munch in The Blood of Dawnwalker: the Rockfalls cave kobold, its four-segment boss bar, the red-skull unblockable attacks, and the exact loot.
Was this helpful?
Thanks for the feedback!